Étape 6: Code !


J’ai inclus les 4 fichiers que vous pouvez télécharger :
Brobot.apk :
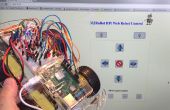
C’est l’application que j’ai fait à l’aide de MIT App Inventor, application android gratuite en ligne IDE. Mettre ce fichier sur votre appareil Android, et il sera affiché sous forme d’application. Ci-dessus vous pourrez voir comment j’ai écrit cette application dans l’App Inventor. Vous pouvez concevoir la mise en page de menu avec des boutons et des options de contrôle, puis vous allez dans une vue du bloc où vous pouvez programmer en fait l’application à l’aide de blocs prédéfinis. Cela rend la programmation très facile.
Brobot.zip :
Ce dossier compressé contient Brobot.h et Brobot.cpp.
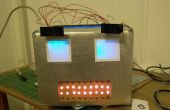
Brobot.h contient les instanciations de Brobot classe fonction, les déclarations de variables, et le bit des cartes pour toutes les émotions affichées sur les yeux de LED. Ces cartes de bit je voudrais changer quoi chaque émotion ressemble rapidement en changeant chaque bit individuellement.
Brobot.cpp contient toutes les définitions de fonction pour la classe de Brobot. Les fonctions les plus importantes ici comprennent :
updateFace : cette fonction contrôle quelle émotion Brobot affiche actuellement et quelle émotion il exposera ensuite. Il gère également le clignote au hasard et ce qui est affichage de l’écran LCD.
playComplete : cette fonction gère les différents sons Brobot fera selon ses émotions.
checkProx : c’est la fonction qui détermine si le Brobot devrait cesser immédiatement ce qu’elle fait et loi surpris. Il génère un interrrupt.
brobot_sketch.zip :
Ce dossier est explicite. Il contient le principaux croquis que j’ai écrit pour Brobot. Fondamentalement, il instancie l’ensemble des variables et des minuteries de Brobot et met à jour la face de chaque boucle. Il gère aussi toutes la servocommande parce que pour une raison quelconque, je ne pouvais pas les servos de travailler dans leur propre fonction dans Brobot.cpp. Tous les servos ont variables angle actuelle et la prochaine qui permettent les servos déplacer qu'une ou moins fois jamais en boucle jusqu'à ce que l’angle actuel est égal à l’angle net.
BBSounds.zip :
Ce dossier contient tous les fichiers wav pour chaque son Brobot peut faire. Pour charger ces sur le bouclier de la vague, juste sortir de la carte SD, mettez-le dans votre ordinateur et glissez et déposez les sons que vous souhaitez utiliser pour Brobot sur la carte SD. Puis vient la pop dans le bouclier de la vague, changer les noms de fichiers dans le playComplete fonctionnent pour les noms de fichiers vous chargées sur la carte et d’écoutent Brobot faire de drôles de bruits ! Tous le gratuit opensource sons téléchargées de th
/************************************************************* // Brobot: Header File
// This file contains the Brobot class function and variable
// declarations as well as the led bitmaps for each emotion // Programmer: Chris Frazier // Date: 4/8/2015 **************************************************************/
#ifndef BROBOT_H #define BROBOT_H
#include "Arduino.h" #include "C:\Users\ChristopherEvan\Documents\Arduino\libraries\Wire\Wire.h" #include "C:\Users\ChristopherEvan\Documents\Arduino\libraries\SoftwareServo\SoftwareServo.h" #include "C:\Users\ChristopherEvan\Documents\Arduino\libraries\Adafruit_LEDBackpack\Adafruit_LEDBackpack.h" #include "C:\Users\ChristopherEvan\Documents\Arduino\libraries\Adafruit_GFX\Adafruit_GFX.h" #include "C:\Users\ChristopherEvan\Documents\Arduino\libraries\WaveHC\FatReader.h" #include "C:\Users\ChristopherEvan\Documents\Arduino\libraries\WaveHC\SdReader.h" #include #include "C:\Users\ChristopherEvan\Documents\Arduino\libraries\WaveHC\WaveUtil.h" #include "C:\Users\ChristopherEvan\Documents\Arduino\libraries\WaveHC\WaveHC.h" #include "C:\Users\ChristopherEvan\Documents\Arduino\libraries\LiquidCrystal_I2C\LiquidCrystal_I2C.h"
// Each emotion is represented by an integer from 0 - 6 #define NEUTRAL 0xF0 #define HAPPY 0xF1 #define SAD 0xF2 #define ANGRY 0xF3 #define SURPRISED 0xF4 #define LOVE 0xF5 #define BLINK 0xF6 #define NECK_SPEED 1 #define MAX_TILT_ANGLE 135 #define MIN_TILT_ANGLE 65 #define MAX_PAN_ANGLE 120 #define MIN_PAN_ANGLE 40
class Brobot{ public: Brobot(byte, byte, byte, byte, byte, byte); //Constructor void setup(); void setEmotion(byte); // Allows main file to access current emotion void updateFace(); bool checkProx(); void playComplete(); void playFile(char*); byte freeRam(); void sdErrorCheck(); void checkBT(); SoftwareServo pan; SoftwareServo tilt; SoftwareServo leftBrow; SoftwareServo rightBrow; byte currentEmotion; byte nextEmotion; byte incomingByte; byte currentPanAngle; byte currentTiltAngle; byte nextPanAngle; byte nextTiltAngle; byte currentLBAngle; byte currentRBAngle; byte nextLBAngle; byte nextRBAngle; byte neckSpeed; byte neckTimer; bool headMoveToggle; bool upToggle; bool downToggle; bool leftToggle; bool rightToggle; bool soundToggle; bool togglePause; SdReader card; // This object holds the information for the card FatVolume vol; // This holds the information for the partition on the card FatReader root; // This holds the information for the filesystem on the card FatReader f; // This holds the information for the file we're play WaveHC wave; // This is the only wave (audio) object, since we will only play one at a time private: void displayString(const char *); byte previousEmotion; byte blinkTimer; byte surpriseTimer; byte triggerPin; byte echoPin; bool _setup; byte randSound; byte k; char myChar; }; #endif
static const uint8_t PROGMEM happyL_bmp[] = { B00000000, B00011100, B00100100, B01011100, B01011100, B00100100, B00011100, B00000000 }, happyR_bmp[] = { B00000000, B00011100, B00100100, B01011100, B01011100, B00100100, B00011100, B00000000 }, neutralL_bmp[] = { B00000000, B00111100, B01000010, B01011010, B01011010, B01000010, B00111100, B00000000 }, neutralR_bmp[] = { B00000000, B00111100, B01000010, B01011010, B01011010, B01000010, B00111100, B00000000 }, angryL_bmp[] = { B00000000, B00001100, B00010010, B00111010, B01011010, B11000010, B00111100, B00000000 }, angryR_bmp[] = { B00000000, B00111100, B11000010, B01011010, B00111010, B00010010, B00001100, B00000000 }, surprisedL_bmp[] = { B01111110, B10000001, B10000001, B10011001, B10011001, B10000001, B10000001, B01111110 }, surprisedR_bmp[] = { B01111110, B10000001, B10000001, B10011001, B10011001, B10000001, B10000001, B01111110 }, sadL_bmp[] = { B00000000, B00111100, B01000010, B01011010, B00111010, B00010010, B00001100, B00000000 }, sadR_bmp[] = { B00000000, B00001100, B00010010, B00111010, B01011010, B01000010, B00111100, B00000000 }, loveL_bmp[] = { B01111000, B10000100, B10000010, B01011001, B01011001, B10000010, B10000100, B01111000 }, loveR_bmp[] = { B01111000, B10000100, B10000010, B01011001, B01011001, B10000010, B10000100, B01111000 }, blink_bmp[] = { B00000000, B00000100, B00000010, B00000010, B00000010, B00000010, B00000100, B00000000 }; <p>/*************************************************************<br>// Brobot: Source File // This file contains the Brobot class function // definitions // Programmer: Chris Frazier // Date: 4/8/2015 **************************************************************/</p><p>#include "Brobot.h"</p><p>// Create led matrix instance using Adafruit's library Adafruit_8x16matrix ledmatrix = Adafruit_8x16matrix(); LiquidCrystal_I2C myDisplay = LiquidCrystal_I2C(0x27, 16, 2); // save some messages const char emotion[] PROGMEM = {"Emotion: "}; const char blank[] PROGMEM = {" "}; const char hello[] PROGMEM = {"Hello, "}; const char imBrobot[] PROGMEM = {"I'm Brobot! "}; const char neutral[] PROGMEM = {"NEUTRAL "}; const char happy[] PROGMEM = {"HAPPY "}; const char sad[] PROGMEM = {"SAD "}; const char angry[] PROGMEM = {"ANGRY "}; const char surprised[] PROGMEM = {"SURPRISED "}; const char love[] PROGMEM = {"LOVE "}; // Constructor: lets user set the pins Brobot::Brobot(byte pp, byte tp, byte lbp, byte rbp, byte ep, byte trgp){ triggerPin = trgp; echoPin = ep; neckTimer = 0; neckSpeed = NECK_SPEED; previousEmotion = NEUTRAL; currentEmotion = HAPPY; nextEmotion = HAPPY; pinMode(echoPin, INPUT); //set pinmodes for prox sensor pinMode(triggerPin, OUTPUT); soundToggle = false; togglePause = false; }</p><p>void Brobot::displayString(const char *message){ for (k = 0; k < 15; k++) { myChar = pgm_read_byte_near(message + k); myDisplay.print(myChar); } }</p><p>// Used during setup; initializes Brobot's face void Brobot::setup() { ledmatrix.begin(0x70); myDisplay.init(); //initialize the lcd myDisplay.backlight();//this turns the backlight on displayString(hello); //this sets the cursor of the display to the second row and 9th character position in that row myDisplay.setCursor(1,8); //then we print at the cursor position displayString(imBrobot); playComplete(); delay(2000); myDisplay.setCursor(0,0); displayString(emotion); myDisplay.setCursor(1,8); displayString(neutral); _setup = true; updateFace(); _setup = false; }</p><p>// Allows main file access to next emotion void Brobot::setEmotion(byte i) { nextEmotion = i; }</p><p>// Decides which emotion to display on Brobot's face void Brobot::updateFace() { // Generates random blinks if(currentEmotion != BLINK) { if(random(1000) == 0) { nextEmotion = BLINK; blinkTimer = 50; } } // decrements blink timer to make sure Brobot doesn't fall asleep! else if (currentEmotion == BLINK) { if(blinkTimer > 0) { blinkTimer--; } else { // Return to previous emotion after blink nextEmotion = previousEmotion; } } // check the prox sensor and surprise Brobot if(!_setup && !togglePause){ if (checkProx()) { nextEmotion = SURPRISED; surpriseTimer = 100; } // make sure Brobot doesn't go into shock! else if(!checkProx()){ if(surpriseTimer > 0) { surpriseTimer--; } else if(currentEmotion != BLINK){ if (nextEmotion == currentEmotion) { // Return to previous emotion after surprise nextEmotion = previousEmotion; } } } } // Change emotions if next emotion is different // This prevents from updating every loop and wasting power if (nextEmotion != currentEmotion) { if (nextEmotion == NEUTRAL) { ledmatrix.clear(); ledmatrix.drawBitmap(0, 0, neutralR_bmp, 8, 8, LED_ON); ledmatrix.writeDisplay(); ledmatrix.drawBitmap(0, 8, neutralL_bmp, 8, 8, LED_ON); ledmatrix.writeDisplay(); currentEmotion = NEUTRAL; previousEmotion = NEUTRAL; myDisplay.setCursor(1,8); displayString(neutral); soundToggle = true; } else if (nextEmotion == HAPPY) { ledmatrix.clear(); ledmatrix.drawBitmap(0, 0, happyR_bmp, 8, 8, LED_ON); ledmatrix.writeDisplay(); ledmatrix.drawBitmap(0, 8, happyL_bmp, 8, 8, LED_ON); ledmatrix.writeDisplay(); currentEmotion = HAPPY; previousEmotion = HAPPY; myDisplay.setCursor(1,8); displayString(happy); soundToggle = true; } else if (nextEmotion == SAD) { ledmatrix.clear(); ledmatrix.drawBitmap(0, 0, sadR_bmp, 8, 8, LED_ON); ledmatrix.writeDisplay(); ledmatrix.drawBitmap(0, 8, sadL_bmp, 8, 8, LED_ON); ledmatrix.writeDisplay(); currentEmotion = SAD; previousEmotion = SAD; myDisplay.setCursor(1,8); displayString(sad); soundToggle = true; } else if (nextEmotion == ANGRY) { ledmatrix.clear(); ledmatrix.drawBitmap(0, 0, angryR_bmp, 8, 8, LED_ON); ledmatrix.writeDisplay(); ledmatrix.drawBitmap(0, 8, angryL_bmp, 8, 8, LED_ON); ledmatrix.writeDisplay(); currentEmotion = ANGRY; previousEmotion = ANGRY; myDisplay.setCursor(1,8); displayString(angry); soundToggle = true; } else if (nextEmotion == SURPRISED) { ledmatrix.clear(); ledmatrix.drawBitmap(0, 0, surprisedR_bmp, 8, 8, LED_ON); ledmatrix.writeDisplay(); ledmatrix.drawBitmap(0, 8, surprisedL_bmp, 8, 8, LED_ON); ledmatrix.writeDisplay(); currentEmotion = SURPRISED; myDisplay.setCursor(1,8); displayString(surprised); soundToggle = true; } else if (nextEmotion == LOVE) { ledmatrix.clear(); ledmatrix.drawBitmap(0, 0, loveR_bmp, 8, 8, LED_ON); ledmatrix.writeDisplay(); ledmatrix.drawBitmap(0, 8, loveL_bmp, 8, 8, LED_ON); ledmatrix.writeDisplay(); currentEmotion = LOVE; previousEmotion = LOVE; myDisplay.setCursor(1,8); displayString(love); soundToggle = true; } else if (nextEmotion == BLINK) { ledmatrix.clear(); ledmatrix.drawBitmap(0, 0, blink_bmp, 8, 8, LED_ON); ledmatrix.writeDisplay(); ledmatrix.drawBitmap(0, 8, blink_bmp, 8, 8, LED_ON); ledmatrix.writeDisplay(); currentEmotion = BLINK; } }SoftwareServo::refresh(); }</p><p>// Check and see if someone is too close to Brobot bool Brobot::checkProx(){ digitalWrite(triggerPin, HIGH); // make a 10usec pulse delayMicroseconds(10);</p><p> digitalWrite(triggerPin, LOW);</p><p> float distance = pulseIn(echoPin, HIGH); //now read the pulse that is sent back by the sensor //pulseIn returns the pulse length in usec</p><p> distance = distance / 58; if (distance < 6){ return true; } else{ return false; } }</p><p>void Brobot::checkBT(){ while (Serial.available()) { delay(3); incomingByte = Serial.read(); } if ((incomingByte < 0xFE) && (incomingByte >= 0xE0)) { // Set emotion corresponding to byte received if (incomingByte > -1) { Serial.println(incomingByte); setEmotion(incomingByte); if(incomingByte == 0xE0) { headMoveToggle = !headMoveToggle; } if(incomingByte == 0xE1){ upToggle = !upToggle; } else if(incomingByte == 0xE3){ leftToggle = !leftToggle; } else if(incomingByte == 0xE2){ rightToggle = !rightToggle; } else if(incomingByte == 0xE4){ downToggle = !downToggle; } } incomingByte = -1; } }</p><p>// Plays a full file from beginning to end with no pause. void Brobot::playComplete() { // call our helper to find and play this name //SoftwareServo::refresh(); //delay(30);</p><p> if(currentEmotion == NEUTRAL){ randSound = random(1,15); if(randSound == 1) { playFile("NEUT1.WAV"); } else if(randSound == 2){ playFile("NEUT2.WAV"); } } else if(currentEmotion == HAPPY){ randSound = random(1,3); if(randSound == 1) { playFile("HAPPY1.WAV"); } else if(randSound == 2){ playFile("HAPPY2.WAV"); } else if(randSound == 3){ playFile("HAPPY3.WAV"); } } else if(currentEmotion == SAD){ randSound = random(1,3); if(randSound == 1) { playFile("SAD1.WAV"); } else if(randSound == 2){ playFile("SAD2.WAV"); } else if(randSound == 3){ playFile("SAD3.WAV"); } else if(randSound == 4){ playFile("SAD4.WAV"); } } else if(currentEmotion == ANGRY){ randSound = random(1,3); if(randSound == 1) { playFile("ANGRY1.WAV"); } else if(randSound == 2){ playFile("ANGRY2.WAV"); } else if(randSound == 3){ playFile("ANGRY3.WAV"); } } else if(currentEmotion == SURPRISED){ randSound = random(1,6); if(randSound == 1) { playFile("SURP1.WAV"); } else if(randSound == 2){ playFile("SURP2.WAV"); } else if(randSound == 3){ playFile("SURP3.WAV"); } else if(randSound == 4){ playFile("SURP4.WAV"); } else if(randSound == 5){ playFile("SURP6.WAV"); } else if(randSound == 6){ playFile("SURP6.WAV"); } } else if(currentEmotion == LOVE){ randSound = random(1,3); if(randSound == 1) { playFile("LOVE1.WAV"); } else if(randSound == 2){ playFile("LOVE2.WAV"); } else if(randSound == 3){ playFile("LOVE3.WAV"); } }soundToggle = false;</p><p> while(wave.isplaying) { // pause } // now its done playing } void Brobot::playFile(char *name) { // see if the wave object is currently doing something if (wave.isplaying) {// already playing something, so stop it! wave.stop(); // stop it } // look in the root directory and open the file if (!f.open(root, name)) { putstring("Couldn't open file "); Serial.print(name); return; } // OK read the file and turn it into a wave object if (!wave.create(f)) { putstring_nl("Not a valid WAV"); return; } // ok time to play! start playback wave.play(); } // this handy function will return the number of bytes currently free in RAM, great for debugging! byte Brobot::freeRam(void) { extern int __bss_end; extern int *__brkval; int free_memory; if((int)__brkval == 0) { free_memory = ((int)&free_memory) - ((int)&__bss_end); } else { free_memory = ((int)&free_memory) - ((int)__brkval); } return free_memory; } </p><p>void Brobot::sdErrorCheck(void) { if (!card.errorCode()) return; putstring("\n\rSD I/O error: "); Serial.print(card.errorCode(), HEX); putstring(", "); Serial.println(card.errorData(), HEX); while(1); }</p><p>/*************************************************************<br>// Brobot: Main File // This file contains the setup and execution loop for the Arduino // while Brobot is in operation. // Programmer: Chris Frazier // Date: 4/8/2015 **************************************************************/</p><p>#include "Wire.h" #include "SoftwareServo.h" #include "Adafruit_LEDBackpack.h" #include "Adafruit_GFX.h" #include #include #include "WaveHC.h"</p><p>#define panPin 14 // This is the pan servo pin #define tiltPin 15 // This is the tilt servo pin #define leftBrowPin 16 // This is the left eyebrow servo pin #define rightBrowPin 17 // This is the right eyebrow servo pin #define echoPin 8 // This is the echo pin #define triggerPin 7 // This is the trigger pin</p><p>// Create an instance of Brobot Brobot myBrobot(panPin, tiltPin, leftBrowPin, rightBrowPin, echoPin, triggerPin);</p><p>void setup() { Serial.begin(9600); // Set baud rate for serial protocol putstring("Free RAM: "); // This can help with debugging, running out of RAM is bad Serial.println(myBrobot.freeRam()); // if this is under 150 bytes it may spell trouble! // Set the output pins for the DAC control. This pins are defined in the library pinMode(2, OUTPUT); pinMode(3, OUTPUT); pinMode(4, OUTPUT); pinMode(5, OUTPUT); // if (!card.init(true)) { //play with 4 MHz spi if 8MHz isn't working for you if (!myBrobot.card.init()) { //play with 8 MHz spi (default faster!) putstring_nl("Card init. failed!"); // Something went wrong, lets print out why myBrobot.sdErrorCheck(); while(1); // then 'halt' - do nothing! } // enable optimize read - some cards may timeout. Disable if you're having problems myBrobot.card.partialBlockRead(true); // Now we will look for a FAT partition! uint8_t part; for (part = 0; part < 5; part++) { // we have up to 5 slots to look in if (myBrobot.vol.init(myBrobot.card, part)) break; // we found one, lets bail } if (part == 5) { // if we ended up not finding one :( putstring_nl("No valid FAT partition!"); myBrobot.sdErrorCheck(); // Something went wrong, lets print out why while(1); // then 'halt' - do nothing! } // Lets tell the user about what we found putstring("Using partition "); Serial.print(part, DEC); putstring(", type is FAT"); Serial.println(myBrobot.vol.fatType(),DEC); // FAT16 or FAT32? // Try to open the root directory if (!myBrobot.root.openRoot(myBrobot.vol)) { putstring_nl("Can't open root dir!"); // Something went wrong, while(1); // then 'halt' - do nothing! } // Initialize all of Brobot's public variables myBrobot.incomingByte = -1; myBrobot.currentPanAngle = 90; myBrobot.currentTiltAngle = 90; myBrobot.nextPanAngle = 90; myBrobot.nextTiltAngle = 90; myBrobot.currentLBAngle = 90; myBrobot.currentRBAngle = 90; myBrobot.neckTimer = 400; myBrobot.neckSpeed = NECK_SPEED; myBrobot.headMoveToggle = 0; myBrobot.leftToggle = 0; myBrobot.rightToggle = 0; myBrobot.upToggle = 0; myBrobot.downToggle = 0; // Run Brobot setup function (initializes LED eyes) myBrobot.setup(); // Attach and initialize all 4 servos myBrobot.pan.attach(panPin); myBrobot.tilt.attach(tiltPin); myBrobot.leftBrow.attach(leftBrowPin); myBrobot.rightBrow.attach(rightBrowPin); myBrobot.pan.write(myBrobot.currentPanAngle); delay(20); myBrobot.tilt.write(myBrobot.currentTiltAngle); myBrobot.leftBrow.write(myBrobot.currentLBAngle); myBrobot.rightBrow.write(myBrobot.currentRBAngle); //SoftwareServo::refresh(); delay(20); myBrobot.updateFace(); delay(2000); SoftwareServo::refresh(); } void loop() { // Every loop check for Bluetooth data myBrobot.checkBT(); // The following code sets Brobot's eyebrow positions // - - if(myBrobot.nextEmotion == NEUTRAL) { //myBrobot.togglePause = true; myBrobot.nextLBAngle = 90; myBrobot.nextRBAngle = 90; while((myBrobot.currentLBAngle != myBrobot.nextLBAngle) || (myBrobot.currentRBAngle != myBrobot.nextRBAngle)){ if(myBrobot.currentLBAngle < myBrobot.nextLBAngle){ myBrobot.currentLBAngle++; } else if(myBrobot.currentLBAngle > myBrobot.nextLBAngle){ myBrobot.currentLBAngle--; } if(myBrobot.currentRBAngle < myBrobot.nextRBAngle){ myBrobot.currentRBAngle++; } else if(myBrobot.currentRBAngle > myBrobot.nextRBAngle){ myBrobot.currentRBAngle--; } myBrobot.leftBrow.write(myBrobot.currentLBAngle); myBrobot.rightBrow.write(myBrobot.currentRBAngle); SoftwareServo::refresh(); } //if((myBrobot.currentLBAngle == myBrobot.nextLBAngle) && (myBrobot.currentRBAngle == myBrobot.nextRBAngle)){ // myBrobot.togglePause = false; //} } // / \ else if(myBrobot.nextEmotion == SURPRISED || myBrobot.nextEmotion == HAPPY || myBrobot.nextEmotion == SAD || myBrobot.nextEmotion == LOVE) { //myBrobot.togglePause = true; myBrobot.nextLBAngle = 120; myBrobot.nextRBAngle = 60; while((myBrobot.currentLBAngle != myBrobot.nextLBAngle) || (myBrobot.currentRBAngle != myBrobot.nextRBAngle)){ if(myBrobot.currentLBAngle < myBrobot.nextLBAngle){ myBrobot.currentLBAngle++; } else if(myBrobot.currentLBAngle > myBrobot.nextLBAngle){ myBrobot.currentLBAngle--; } if(myBrobot.currentRBAngle < myBrobot.nextRBAngle){ myBrobot.currentLBAngle++; } else if(myBrobot.currentRBAngle > myBrobot.nextRBAngle){ myBrobot.currentRBAngle--; } myBrobot.leftBrow.write(myBrobot.currentLBAngle); myBrobot.rightBrow.write(myBrobot.currentRBAngle); SoftwareServo::refresh(); } //if((myBrobot.currentLBAngle == myBrobot.nextLBAngle) && (myBrobot.currentRBAngle == myBrobot.nextRBAngle)){ // myBrobot.togglePause = false; //} } // \ / else if(myBrobot.nextEmotion == ANGRY) { //myBrobot.togglePause = true; myBrobot.nextLBAngle = 60; myBrobot.nextRBAngle = 120; while((myBrobot.currentLBAngle != myBrobot.nextLBAngle) || (myBrobot.currentRBAngle != myBrobot.nextRBAngle)){ if(myBrobot.currentLBAngle < myBrobot.nextLBAngle){ myBrobot.currentLBAngle++; } else if(myBrobot.currentLBAngle > myBrobot.nextLBAngle){ myBrobot.currentLBAngle--; } if(myBrobot.currentRBAngle < myBrobot.nextRBAngle){ myBrobot.currentRBAngle++; } else if(myBrobot.currentRBAngle > myBrobot.nextRBAngle){ myBrobot.currentRBAngle--; } myBrobot.leftBrow.write(myBrobot.currentLBAngle); myBrobot.rightBrow.write(myBrobot.currentRBAngle); SoftwareServo::refresh(); } //if((myBrobot.currentLBAngle == myBrobot.nextLBAngle) && (myBrobot.currentRBAngle == myBrobot.nextRBAngle)){ // myBrobot.togglePause = false; //} } SoftwareServo::refresh(); // Update Brobot's face each loop myBrobot.updateFace(); /* The following code controls the pan/tilt neck servos // Brobot will randomly look in a defined set of angles for both pan and tilt. // Each loop, if the current servo position variable is not at the same position // as the next position variable, the servos will increment/decrement the current // angle by 1 as needed. The neckSpeed variable causes the pan/tilt servos to only // change every *neckspeed* loop cycle. The neckTimer variable causes Brobot to pause // before looking in another direction. */ if(myBrobot.headMoveToggle == 0){ if (myBrobot.currentPanAngle == myBrobot.nextPanAngle){ if(myBrobot.neckTimer == 0){ myBrobot.nextPanAngle = random(MIN_PAN_ANGLE, MAX_PAN_ANGLE); myBrobot.nextTiltAngle = random(MIN_TILT_ANGLE, MAX_TILT_ANGLE); } else { myBrobot.neckTimer--; } } else { myBrobot.neckSpeed--; myBrobot.neckTimer = random(60, 80); if(myBrobot.neckSpeed == 0){ if(millis() % 2 == 0) { if(myBrobot.currentPanAngle < myBrobot.nextPanAngle){ myBrobot.currentPanAngle++; } else if(myBrobot.currentPanAngle > myBrobot.nextPanAngle){ myBrobot.currentPanAngle--; } myBrobot.pan.write(myBrobot.currentPanAngle); SoftwareServo::refresh(); //delay(10); } else { if(myBrobot.currentTiltAngle < myBrobot.nextTiltAngle){ myBrobot.currentTiltAngle++; } else if(myBrobot.currentTiltAngle > myBrobot.nextTiltAngle){ myBrobot.currentTiltAngle--; } myBrobot.tilt.write(myBrobot.currentTiltAngle); SoftwareServo::refresh(); } myBrobot.neckSpeed = NECK_SPEED; } } } else { myBrobot.neckSpeed--; if(myBrobot.neckSpeed == 0){ if(myBrobot.currentTiltAngle <= MAX_TILT_ANGLE) { if(myBrobot.upToggle){ myBrobot.currentTiltAngle++; } } if(myBrobot.currentTiltAngle >= MIN_TILT_ANGLE) { if(myBrobot.downToggle){ myBrobot.currentTiltAngle--; } } if(myBrobot.currentPanAngle <= MAX_PAN_ANGLE) { if(myBrobot.rightToggle){ myBrobot.currentPanAngle++; } } if(myBrobot.currentPanAngle >= MIN_PAN_ANGLE) { if(myBrobot.leftToggle){ myBrobot.currentPanAngle--; } } myBrobot.pan.write(myBrobot.currentPanAngle); myBrobot.tilt.write(myBrobot.currentTiltAngle); SoftwareServo::refresh(); delay(10); myBrobot.neckSpeed = NECK_SPEED; } } if(myBrobot.soundToggle && !myBrobot.togglePause){ SoftwareServo::refresh(); //delay(200); myBrobot.playComplete(); } }</p>
